
If your windows are not in good shape, or you are thinking of giving your house a new look, replacing them with new replacement windows is the best solution. Undoubtedly, you will come across many types of windows, and what you choose will depend on your preference and budget.
If you plan to do a DIY of the replacement windows, you will have to choose an installation technique that suits you best. If you are not sure about the process, WindowTech Windows and Doors professionals can guide you throughout your process but in case you are unsure about DIY, they can handle the project for you. Remember that wrongly installed replacement windows will not serve their purpose well; something you obviously don’t want to happen. Click for more here.
What Will You Need?

1. The Right Skillset
Ensure that you have the necessary skills needed for windows replacement. The level of skills required to do this varies, depending upon the type of replacement needed. Say, for example, the process of installing a full-frame window is more complicated as compared to installing an insert type window.
In a full-frame one, you need to completely tear out the parts and then replace them with new parts. However, in an insert type, you need not remove the pre-existing parts. Make sure to watch installation videos before you start installing the windows.
2. A Toolbox
Make sure that you have the right tools needed to do the replacement work. To replace the window on your own, you will need the following tools:
- Hammer
- Safety Goggles
- Measuring Tape
- Screwdriver
- Putty Knife
3. Plan A Schedule
You would not want to start the work and then not finish it because of time limitations. Replacing the window yourself will take around four to six hours.
Make sure you have enough time in your hand before starting with the work. Full-frame window installation requires more time. Hence, read through the guidelines present in the installation manual properly to have an idea of the time needed.
How to Install a Window

1. Avoid Common Mistakes
Before you start the process, ensure you get the right measurements to get fitting replacement windows. If you are only doing windows replacement using an old frame, check well to ensure it is not rotten. If you cannot get the exact window, widen your search. Look for more stores.
2. Prepare the Window
After assembling the tools, remove all the debris and dust from the area. Ensure you cover the floor and furniture to avoid dust landing on them. Cover the air duct system too.
3. Remove the Old Window
Remove the interior and exterior window trim, sill, and plate using a hammer and pry bar. If you are planning to reuse the trim, be gentle on it. Remove all the screws and nails holding the window. Use razor knives to remove seams.
4. Prepare the Opening

Ensure the horizontal headers and vertical studs are plumb and square. If your replacement windows are not the exact size of the previous one, you will need to add new boards.
5. Spray The Foam
The next step includes shooting the foam into the hole until it starts to ooze out. Spray the foam in sash-weight pockets as well as in the side jambs. Allow the excess foam to harden and leave it at least for 6 hours.
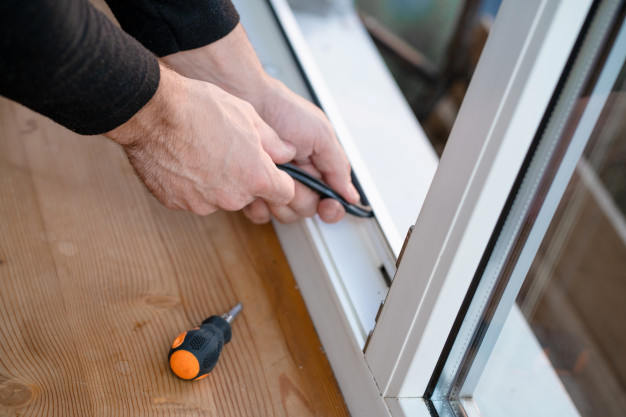
6. Caulk Before Installing
Before installing the windows, apply an elastomeric caulk to the inner surface of the inner frame. You must also apply it to the blind stops on the top and the sides of the frame. Also, apply at least two continuous beads of caulk along the sills of your window.
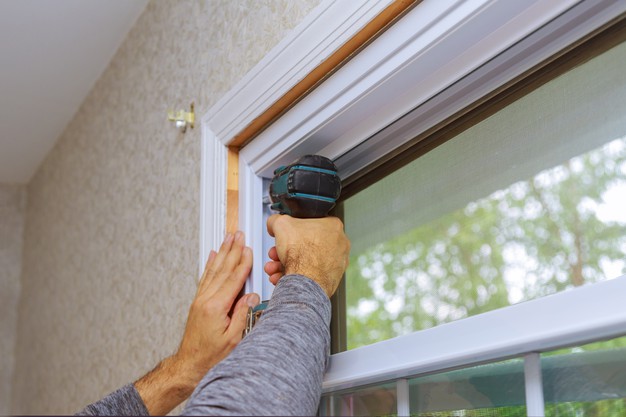
7. Window Installation
Dry-fit the window first to ensure it is the right size. Put a bead of silicone on the outside part of the opening and insert the new window. Use shim and level to adjust it and make sure it fits well.
Hold the window in place with a 2-inch long screw-driven loosely on the window and tighten it into the frame. Ensure that the screw is inserted appropriately such that it allows the window to operate correctly and smoothly. Close and lock the sash, so it stays in place.
For the best weather-tight seal, leave some space around the perimeter of the window and then apply flashing tape.
However, if the window is still in good shape, you can save money by simply replacing the glass. You need not buy a new window.
8. Caulk and Pain

Measure the gaps left between the casing and the window frame from the outside. Fill in the gaps less than ¼ inch wide with the elastomeric caulk. A gap wider than this should be first stuffed with a foam-rubber backed rod. If there are any gaps on the inside as well, fill them by using minimally expanding foam. Wait for the foam to dry and trim off any excess foam after it has dried. Finish the process by reinstalling the stops and adding new ones.
Put the jamb extensions in place together with the interior trim molding using the trim trainer. Fill all the holes with wood putty. Paint and stain the New window and frame to give it a better look. Use the installation tools carefully. Also, make sure to watch the installation video before replacing your windows.
Conclusion
There are two types of installation that you can opt for. Full-frame and pocket installation. The task of replacing your windows is not as easy as you think. However, with the help of a few tips, you can get it done right. Take proper precautions, research properly, and get started. Make sure that you have all the required tools.
Follow the steps mentioned above to replace the windows yourself. If you are sure that you can tackle the job, you should definitely try it yourself. You can save money by installing replacement windows yourself. An adequately replaced window will last longer than you may have expected.