
UV laser marking machines are an incredible tool that can be used to mark a variety of objects made of many different materials. Their versatility makes them one of the most popular laser machine types, so they’ve found their place in many industries.
However, working with these machines can be quite frustrating when you’re a newbie. Making a clean cut can be extremely difficult at the beginning. However, it doesn’t necessarily have to be this way! In this article, we bring you some of the best tips and tricks that can help you get the best out of your new laser in no time whatsoever!
So, without any further ado, let’s get to the bottom of it!
Consider masking to avoid stains
If you’re not using masking tapes while engraving on stainable surfaces, we think you should reconsider your choices! As you probably already know, the smoke from engraving can stain the engraved surface, which can look quite unappealing. Covering the material with some masking tape is the best way to prevent this from happening. Because the UV lasers are incredibly powerful, masking won’t affect the machine’s effectiveness at all. So, there’s no need to worry. Besides, you can always turn up the power if you notice the results aren’t quite the same.
Don’t ignore the presets!
Your laser will come with recommended settings for marking different types of materials. Make sure to load these into your computer and rename them into something easily recognizable. If you’re unsure how to do this, check your user manual. Overall, the suggested pre-settings are there for a reason. You can always customize them to your specific needs (when you need a deeper cut for example), but they represent excellent guidelines for when you’re only starting to work with a certain type of material.
Test cuts are always a good idea
Taking one extra minute to perform some test cuts is an efficient way to ensure the best possible results. The best way to do this is by cutting a small circle right in the corner of the surface in question. After you’ve done this, you’ll know whether you should increase or decrease the power to achieve what you’ve envisioned. Make sure not to overdo it since too many test cuts can be a complete waste of material. The mark should be half an inch wide at most.
Even though this might seem unnecessary, it’s a great way to improve your laser marking skills. Once you gain experience, you won’t need to make a test cut every time you decide to use the machine, but it will still be a good idea to do this from time to time (especially when working with new materials).
If the lines overlap, draw only one
Sometimes, when you have two shapes where some of their lines overlap, you might choose to draw them “on top” of each other. For example, if you’re drawing two square objects separately, you may decide to but them up against each other so it looks like they “share” a line. Sure, it will look like that to you, but your machine will see two lines instead, leaving you with an ugly cut. So, our tip is to avoid this at all costs, no matter how tempting it might be.
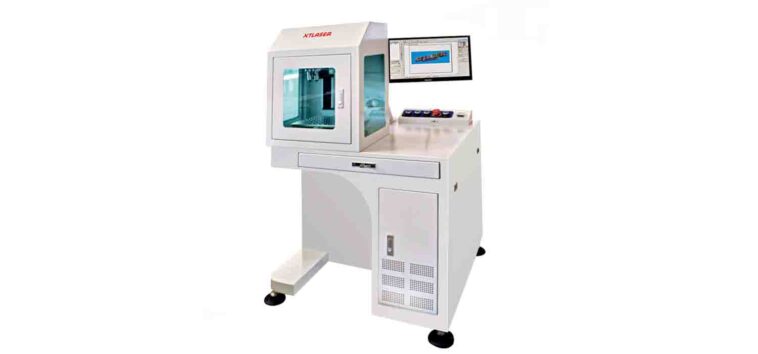
Pick a high-quality UV laser marking machine
We can’t stress this enough: the quality of your machine will directly impact the quality of your markings and engravings! So, before everything else, ensure you get your UV laser marking machine from a reliable supplier such as the one at this site. Now, understanding all the different specs and technicalities can be quite confusing from a non-professional standpoint. All of this makes shopping for a laser quite a daunting task. We suggest you take advantage of various online reviews and ratings that can help you choose the right product.
Also, while these machines can be quite pricey, you don’t need to spend a fortune just to get one. There’s something for anyone’s budget and needs out there, so keep on looking until you find what works for you.
Maintenance and care
While UV laser machines are generally quite low-maintenance, that doesn’t mean they require zero care at all. Make sure to protect all the optical parts and don’t forget to conduct regular inspections. Whenever there’s an issue or some type of malfunction happening, time is always of the essence when it comes to repairs. The longer a small problem goes unnoticed, the more expensive the repairs will be.
Also, do some gentle cleaning from time to time and only allow properly trained staff to handle the machine. It’s the best and only way to protect your pricey investment.
Double-check whether the laser is properly in focus
If your goal is sharp and clean lines, unfocused lasers may be your worst enemy. So, always make sure to set the focus properly before engraving your design onto the material. Of course, sometimes these types of lines will be exactly what you want (depending on your design), and there’s nothing wrong with that if that’s what you’re going for!
Overall, try playing around with the focus until you find the technique that fits your design the best. In most cases, you’ll want your lines to be as crisp as possible, so always make sure to check the focus before running the machine.
Faster marking can be better
Two or more rapid passes can be more effective than a single slower pass in many cases. You can always produce deeper marks by going over the same spot multiple times. One big slow pass can do a lot of thermal damage to your material, making the entire design visually unappealing.
The bottom line
All in all, using a UV laser marking machine can be quite frustrating at first. However, as long as you follow the tips above and keep on developing your skills, you’re certainly going to become good at it in no time whatsoever. So, keep on practicing and playing around with the settings until you get the gist of it. Remember to wear your protective gear while working with the machine and keep the user manual near you at all times.